December 19, 2011

Slacking

I am officially a blogger slacker.  The Christmas Holiday is just around the corner....I've known it was coming all year long but even as I watched the Sunday morning Show on CBS and they said we'll see you next Sunday for our Christmas show it shocked me.  Isn't that how it always goes?

I've been busy wrapping gifts, doing last minute shopping and making Christmas candy for some friends.  I took some pictures for a tutorial on these heavenly cookies that Aunt Tina made that I HAD to have the recipe for.  They are super easy and oh so delicious.  They just melt in your mouth.  I plan to post that blog this week. 

But for now, here is Russel, Hunter and me in our annual picture in front of the Christmas tree.  Tookie sometimes is involved in this too but the older she gets the less often that it happens.  
My husband is always the good sport to sit with the dog and wait while I fiddle with the timer / lighting / tripod until we can get a good photo.  And he still has a smile on his face once the actual picture is made.  

I hope that your shopping is done, your tree is trimmed and your heart knows the true meaning on the season. 

December 8, 2011

Holiday Spirit

I am in the holiday spirit.  Christmas play practice at church.  Toys for Tots shopping.  Christmas music.  Decorations.  Making gifts.  Wrapping presents.  I am doing it all.  Today my friend Janet sent me a link to a You Tube video.  And even though I am in the holdiay spirit it just made me even more so.  This guy "dances with an ipod in public" to Christmas Music. I am linking you to his whole You Tube page because he has several videos that just made me smile.  This guy is obviously a budding artist but I love the freedom that he shows.  Most "kids" his age are being akward and trying not to stand out but he is doing the opposite and seems happy doing it.  So here's a little holiday cheer from me to you:

Have a Happy Day!
Stacey

December 1, 2011

Deck the Halls


Every year when Thanksgiving is over and the pumpkins and bales of straw are put away I groan.  Not because I don't love Christmas and the things that surround the holiday but because I despise putting up the tree.  It is pre lit and only in four pieces but the scratchy on my arms when I am "fluffing" the tree is always aggravating......until it comes time to put on the ornaments and then my mood changes.  I love putting the ornaments on the tree.  We have an assortment of all different ornaments.  We have no theme & no color preference.  I have ornaments that invoke memories and smiles.  I can look at nearly every ornament on my tree and tell you where and who it came from. 

The first year that I lived on my own I had a slight pre Christmas breakdown.  I knew it was time to put up a tree and when I started to do so I realized that I had NO ornaments of my own.  I know that it shouldn't have seemed like such a shock to me but it was.  I called mom....tears in my eyes...."mom - I have no ornaments that are mine".  So being the WONDERFUL mom that my mother is, she came to get me and we went to Fred's.  We bought the round plastic ornaments in clear, red and green.  I was afraid it just looked cheesy but she told me that over the years I would build my "OWN" collection of special ornaments.  She was right - as always.  This is the 10th year of living in my house - as a grown up - with our own tree.  If you look closely at my tree there is not a single one of those Fred's ornaments left.  We have been building our own Christmas memories one year at a time and our tree is filling up nicely.          

For the first couple years after the initial discovery that I didn't have ornaments of my own mom did the best thing that she could for me.....she gave me ornaments for every gift holiday year round.  She picked up ornaments that would be special to me from here and there and every mothers day, birthday and Christmas I would get a special new ornament to add to my collection.

Here is one of the first ornaments mom and dad gave me.  I love to fish at the pond - even if I am not catching anything.  
Then Russel and I got married and we bought and received some couple ornaments.
 This one above from Annie and Lance Farrar as part of our wedding gift.
And this one that I had made with our last name and wedding year.

Then there are the ornaments that Russel and I get on every trip we take.  Oddly enough it is never hard any time of year to find a Christmas ornament.  From Jamaica to Hawaii to Gatlinburg and back we pick up an ornament everywhere that we travel. 
Our first trip to Gatlinburg - a Noah's ark ornament

Santa flying over NYC from our trip to Niagara and NYC. 


And last but definitely not least are ornaments that have been given to us by friends. 
A Santa Ball from the Lowe's

My only Christmas Pickle from Janet Duke.  

So I begrudgingly put up the tree so that I can laugh, smile and sometimes shed tears at all the memories that we are making through our lifetime together.  It's a wonderful reminder every year that God gives us a precious life to live and that we should enjoy every moment afforded to us.

Our nativity scene is out and the tree is up, but the rest of the house looks like the attic exploded Christmas and Thanksgiving decorations.  Stay tuned for pictures of the rest of the decorating.  I have to take pictures to show because otherwise only I get to enjoy it.....and I love to share. 

Happy Holidays.

November 17, 2011

Buying sttock in Joann's

Or at least I am thinking that I should buy stock in Joann's.  
*******I wonder if you own their stock if they give you a better discount******


So I guess you know that I am going to say that I have been crafting and YES!  I have.  
I finished my first 5*5 quilt.  I was NOT reading the directions through when I read 5*5.  I thought a 5 foot by 5 foot quilt rather than a 5 block by 5 block.  But it was plenty big enough for my first quilt.  I have to learn better how to maneuver the quilt around while quilting it before I can do anything bigger.
I got the instructions for this lovely little quilt on this blog: cloud9fabrics.blogspot.com 
It is by no means perfect but I am pretty darn proud of it.
I was determined to get it done before Russel's Mimi left town.  I wanted her to see it and she got to.  I finished quilting it on Friday night.  
On Saturday we had Russel's family Thanksgiving at his parents house.  We had a great time and DELISH food.  Here are a few of the pictures:


I didn't get pictures of everyone but Shannon should be sending me a copy of the group photo.  I think at final count there were 44 people & 5 dogs.  


And when everyone had gone home I broke out the sewing supplies and worked on our new stockings.  I wanted 4 similarly matching stockings this year.  I will probably make a light strand with fabric that matches to go on the hearth.  But for the time being these are our new stockings.....with one more cut out and ready to be sewn. 
I hope that you all are enjoying the holiday celebrations that come with this season of Thanksgiving and Christmas.  I know I enjoy time spent with all our family and friends from near and far.  

Stacey


November 11, 2011

Performance Week

I have seen 3 performances in the last 7 days.  I usually don't see that many in a month let alone 7 days.  I loved them all and wanted to give you a little taste. 

Last Thursday, me and one of my besties, Kristie, went to see Wicked at TPAC.  It was SO worth it.  I was worried that I wouldn't love it but I did.  The songs, the dances, the costumes, the story line it all came together to make a spectacular performance.  You can't take pictures during the show but we did snap one before the show started.
Then on Tuesday the new show Hell on Wheels presented Jason Aldean at the Music City Star Rail Station downtown.  Leslie, Bryson, Denise, Terry (Les's mom)and I went down for the concert.  I thought he'd play 2 songs and be done but he played at least 5 or 6.  Here are some photos:
Leslie swears he was pointing at her.  :)
Here are the links to the video I shot - I have one more.They are on You Tube:


And last but not least was the AWESOME show put on at the Ryman last night by Straight No Chaser.  If you haven't ever heard of Straight No Chaser just Google them on the internet or search them on YouTube.  They are an a cappella  group that started singing at college in Indiana and now have their own record deal with Atlantic.  It is amazing whet they can do with NO INSTRUMENTS.  Here's some pictures from last night:
Russel and I waiting for the show to start

This is the very last song that they did with no microphones or headsets.

 If you check out Straight No Chaser online you can view their videos which will easily be much better than mine.    

But here are mine if you don't want to go to the trouble:


Chicken Fried


That Girl is Poison and Billy Jean

Lady Gaga - just a short clip but funny just the same. 


I hope hat you are enjoying your Veterans Day and being thankful for all those who have fought for the rights that we have today. 


Stacey

November 6, 2011

Sew Little Time....

This week and weekend when I should have been cleaning house for the upcoming arrival of Russel's family for Thanksgiving, I was sewing.  I know. I know.  I should have been dusting, sweeping, vacuuming, and picking up my mess but I couldn't bring myself to just clean...therefore, I would clean a little and sew a little and craft a little in between.  Here are this week's creations and the links that helped me to make them.  


A lovely Fabric Banner for my BRAND NEW HUSBAND BUILT floating shelf that I am now using to store my scrap books on.  I found the BEST directions for the banner here at Home Based Mom.  Her instructions for cutting the pennants were so easy to follow. 


I also decided to work on a baby gift for friends that are due next month.  I made an owl, burp cloth, and bib (reversible) all from coordinating fat quarters.  The link to the owl is on one of my previous posts.  I looked at several different tutorials and blogs and used trial & error until I got a burp cloth that I liked.  Note: When you get cloth diapers they are so nice and square....until you wash and dry them.  When I make another one I will take pictures for a tutorial. The bib came from a post on Sew She Sews.  I didn't make the quilted pieces for the bib like she described but used one solid piece of fabric for both the front and back. If you are going to make this bib PLEASE read the instructions through first.  I almost started cutting before I should have.  But the bib was so easy to make. 
I also TRIED to make a whale softie.  Try being the main word.  He's a little distorted.  The pattern came from i heart nap time.  The pattern and instructions are easy to follow however I am not really great at sewing around corners yet.  I guess that will come in time.  
And last but not least .........


A button tree.  I have seen several pinterest posts and blogs with button trees.  I don't suggest it :)  Not because it isn't the cutest thing ever (because it is!)but buttons are expensive, pins are expensive, and it took for ever.  This tree that is less than 12 inches tall took more than 240 buttons!  
 
I also made a scarf for Aunt Tina.  I took it to her and never even took a picture.  It turned out cute and I will make more but again it was a trial and error.
So family - when you come over and the house is far from spotless - it is because I was busy crafting. 
 

November 1, 2011

Guest Post by Denise Manning - Holiday Wreaths

Good Morning,

I am so happy to be "Guest Posting" for Stacey.  She has brought me into the world of "Pinterest" and I can honestly say that I am officially addicted..  lol
I came across the cutest holiday wreaths and wanted to try to make them myself for holiday gifts for the girls.  I DO NOT consider myself a crafty person, but I gotta tell ya this was "supa easy" and hopefully the girls will luv them as much as I did.


YOU WILL NEED THE FOLLOWING:
Glue Gun-

Wreath-I used a Grape Vine Wreath, but I think you could probably use any wreath. 

Tulle-I used 2 different colors

Ribbon-I used 4-5 different ribbon per wreath.  I found it easier to use the holiday ribbon that    has the wire in it.  This aloud me to be able to give my bows the shape that I wanted.  (JoAnn's had holiday ribbon on sale this week for 40% off)

Christmas Ornaments-I used some different size ornaments, but I did find it easier to use the smaller ornaments. 

Christmas Sprigs-meaning the things that you see sticking out of the wreath.  You can also find these at JoAnn's this week on sale.  They totally add dimension to your wreath and give it some sass.

Letter-I am using the letter of the last names of the recipient to add to the wreaths.  You can use any size, but I recommend that you go with a little larger letter b/c you want the letter to be able to be seen through all the busyness of the ribbons that you have added.

Paint-I used red, green and silver.  A small bottle each.  You can absolutely use any colors for your letter and just make your ribbon colors to match.

First Step
I painted my letter the colors and patterns that I wanted them to look like.  You want to do this first so you letter has time to dry before hot gluing it to the wreath.

Second Step
Take one color of your tulle and cut about 8 pcs about 12' long.  Take 2 of those pcs and wrap them around your wreath and tie on a knot.  Puff your tulle as you go and then repeat w/2nd color wrapping the wreath in a different area. 

Third Step
Take your selected ribbon and cut in 12' strips and wrap these around the wreath in a bow like you are tying a shoe lace.  Puff your bows as you go.  Then move to your next box in a different area.  I will tell you that I cut about 6-7 bows for each color ribbon that I had.  The more you add the fuller your wreath will look.  When complete I went through and added a dot of hot glue to the middle of all the bows so that they would stay together the way that I formed them.

Fourth Step
I added all the Christmas Sprigs to the wreath.  They do come in long pcs, so you will have to cut them as you go to make them the size you are fitting in the wreath.  The stick easily right down in the grape vine wreath.  I think that if you used styrofoam wreaths it maybe even easier.  Adding a dot of hot glue to keep these in place when I was done placing them all.

Fifth Step
Make sure your letter that you are using is dry and place on wreath where you would like.  When you are sure where you want to letter to be, then add some hot glue to the back of the letter and place on the wreath.  I went back and tied some extra ribbon around the wreath by the letter after hot gluing b/c I wanted to make it look fuller.

Sixth Step
Hot glue ornaments all over the wreath.  This will add all your shine and sparkle.  On my first one I glued ornament top down, but on the second one I just added a dab of hot glue and placed my ornaments where I wanted them on there side.  I liked this look even better. 

Before I knew it I had just made the cutest wreath that I can't wait for my friends to see.  I hope that they will all enjoy them as I truly loved making them all.  This is a present that they can re-use every year and you know that hand made gifts are the "BEST".

Still need to add my "letter"


MY LAST TIP:
Have fun with it..  There really are no rules, no color boundaries, no size boundaries...  Every wreath will be a little different and that's what makes them unique. 

Hope ya'll have as much fun as I did......... 

and "Thank YOU" again Stac for letting me post.... 

October 31, 2011

Happy Halloween!

Happy Halloween to you and your family.  I hope that no matter your age, you are enjoying the costumes and fun that surrounds Halloween.  I am a big kid at heart and love that in the last few years Russel and I have been to several costume parties where we could dress up and act like kids.  Since we live on the main highway we never have trick or treaters so this is my Halloween fun.   

Growing old is compulsory; growing up is optional. -- Bob Monkhouse

This is from Halloween 2010.  Russel was King Kong and I was Ann Darrow.
 
This year (because I was unaware that Russel was going to be home) I made a purple tutu for the gorilla costume so that I could wear it.  I mean REALLY??? What is funnier than a gorilla in a tutu????
So I brought the costume to work on Friday and we went to the costume contest at One Nashville Place.  Here I am with US Bank Branch Manager Rick Warner.
And by some twist of fate I saw our friend Deborah Strausser at Varallos on the way back to the office.   
Needless to say it was SO much fun to walk around downtown.  I brought the costume back today so we can go out again at lunch.  If we take any more great pictures I will post them this week.  

Also if you are LOVING my purple tutu like I do, I found some great tips on the blog Treasures for Tots.
Per her instructions I used the 6 inch spools of Tulle.  However, I wanted an adjustable waistband so that I could tie the tutu on rather than having to step into it.  So I took 3 pieces of tulle and braided them together to make my waistband and started on the slip knots for the tulle.  Because I wanted a very full tutu and it had to be larger than the standard child size I use 6 rolls of 6 inch wide tulle.  On the blog instructions it gives a standard child's length but if you are making a tutu for an adult I suggest a 25 inch piece of tulle that you will be doubling over - this makes your tutu around 12 inches in length.  Her advice about using a piece of card board to put the tulle around to make your cuts of tulle is GENIUS!  I suggest taking that bit of advice.  
So go out tonight - have fun - be careful and don't go onto sugar overload.     


October 26, 2011

More sewing this week

So I haven't done much cooking this week to post but I have been working away on my sewing machine.  Check out my newest projects:

 Birdies!!!  I found this pattern on spoolsewing.com . These were a little difficult at first but the 2nd bird (blue) turned out much better than the 1st bird (red).


The wine bottle bag (and yes the bottle of wine says Mad Housewife!) was a real challenge for me.  I will be keeping this one myself because it is far from perfect.  I do however have some idea of what I am doing and what I should do next time to make it better.  I will probably try again at some point but this one took me several sessions of getting frustrated before I got it fixed.  I found the pattern on needleandspatula.com


And last of all are OWLS!!!  I LOVE LOVE LOVED making these owls.  They were so much fun and are so so cute. 

I found the pattern for these at Toad's Treasures.


All these patterns were free and since I don't really know what I am doing free is a good way to practice.  I thank all these ladies for sharing their patterns and their talents.  Check out their blogs for all sorts of cute stuff.

Hope that you are all having a great week!

October 23, 2011

Camera strap cover

Wow!  2 posts in one day?!?!?!  What can I say?  I LOVE my new sewing machine.  
I made this camera strap cover this afternoon.  

I followed the AWESOME tutorial by Priddy Creations. And it turned out great.  My camera strap is a little longer than what she gives the instructions for so I lengthened by pattern by a couple of inches.  That had me worried since I am new to sewing but it turned out great. 

Key wristlet ~ My first sewing project

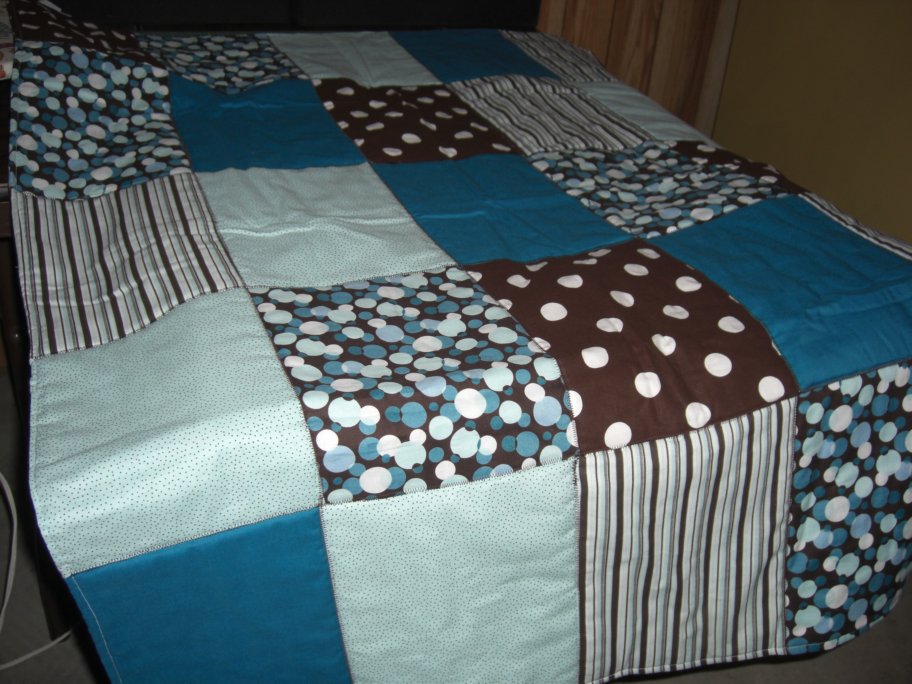
For the last couple years I have told Russel how much I wanted a sewing machine.  He kept telling me to get one but I just never did.....until this past week.  I bought a Brother NS40 and I love it.  I had my first sewing lesson on Thursday.  I am pretty much still just sewing in a straight line but I figured out a project I can do & I want to share that with you.  If I can do it and have had a sewing machine for only 5 days I think anyone with a sewing machine can do it.  I got my idea for the key wristlet from the Thirty-One brand wristlet that I bought a couple weeks ago.  Below are the instructions.

Items you need:
sewing machine
two matching rolls of ribbon
coordinating thread
lighter
Depending on what size you want your wristlet to be you can get either rolls of 5/8 & 7/8 or 3/8 & 5/8 inch wide ribbon.  For this blog I used 3/8 inch white polka dot ribbon as the top and 5/8 inch red polka dot ribbon for the base.  For a wider wristlet use 5/8 inch as your top and 7/8 inch as your base ribbon.

Cut a 15 inch piece length of each of your ribbons (picture below)


 Then I took a lighter and melted one end of each ribbon to keep it from fraying. (picture below)
Line up your two ribbons with the smaller ribbon in the center and sew across the width of one end.  (picture below)
 Then sew down the length of the smaller ribbon to attach it to the larger ribbon.  Do this for both sides. (picture below)
Once the length of the ribbon is sewn on each side then melt the ends of the ribbon that isn't yet sewn together.  Sew across the width of the ribbon so that all four sides of the smaller are now sewn to the base ribbon.  
Then fold the ribbon over to leave about 2 inches of the end as a "tail". (picture below)
Fold the "tail" piece over and let it over lap the facing ribbon by about a 1/2 inch. (picture below)

Sew across the width of the ribbon at each end of the overlap. (picture below)  I didn't pin this I just held it as I sewed.

Attach to a key ring and you have your own key wristlet in your personalized colors.  


FYI:  A 3 yard roll of ribbon will yield about 7 wristlets if cut in the 15 inch pieces.  

I am glad that you visited my blog and are checking out the key wristlets.  While my tutorial is meant for you to use please give credit where credit is due and link to my blog for the original instructions. 

Happy Sewing!


October 19, 2011

Tonight the Great Pumpkin...

will rise out of the pumpkin patch.  He flies through the air and brings toys to all the children of the world - Linus (It's the Great Pumpkin, Charlie Brown)

I love fall.  The cool breezes, falling leaves, hot chocolate, bonfires, pumpkins, and Halloween costumes.  
I do miss the warmth of the summer but all the things that come with fall just make me smile.  Today it has gotten pretty chilly.  I came close to flipping on the heat but decided to throw on flannel pj's and a couple extra blankets to the bed instead.  
Here's some of our fall activities. 

Our "award winning" pumpkin that we put in the Robertson County Fair.  

While the girls were here for fall break - the three of us went to Bradley Kountry Acres and picked out some pumpkins to paint.  I did get some pictures at the pumpkin patch but forgot to get pictures of the finished product.   


 <----- Parking this way!


My sweet pumpkins are so good to pose and smile no matter what I have them doing.  They are so beautiful it's hard not to take tons of photos.  

And coming soon......pictures of my much anticipated halloween costume as well as the recipe  for white chocolate butterscotch blondies (that is if my first batch turns out good).

~~~~Happy Fall Ya'll~~~~