October 31, 2011

Happy Halloween!

Happy Halloween to you and your family.  I hope that no matter your age, you are enjoying the costumes and fun that surrounds Halloween.  I am a big kid at heart and love that in the last few years Russel and I have been to several costume parties where we could dress up and act like kids.  Since we live on the main highway we never have trick or treaters so this is my Halloween fun.   

Growing old is compulsory; growing up is optional. -- Bob Monkhouse

This is from Halloween 2010.  Russel was King Kong and I was Ann Darrow.
 
This year (because I was unaware that Russel was going to be home) I made a purple tutu for the gorilla costume so that I could wear it.  I mean REALLY??? What is funnier than a gorilla in a tutu????
So I brought the costume to work on Friday and we went to the costume contest at One Nashville Place.  Here I am with US Bank Branch Manager Rick Warner.
And by some twist of fate I saw our friend Deborah Strausser at Varallos on the way back to the office.   
Needless to say it was SO much fun to walk around downtown.  I brought the costume back today so we can go out again at lunch.  If we take any more great pictures I will post them this week.  

Also if you are LOVING my purple tutu like I do, I found some great tips on the blog Treasures for Tots.
Per her instructions I used the 6 inch spools of Tulle.  However, I wanted an adjustable waistband so that I could tie the tutu on rather than having to step into it.  So I took 3 pieces of tulle and braided them together to make my waistband and started on the slip knots for the tulle.  Because I wanted a very full tutu and it had to be larger than the standard child size I use 6 rolls of 6 inch wide tulle.  On the blog instructions it gives a standard child's length but if you are making a tutu for an adult I suggest a 25 inch piece of tulle that you will be doubling over - this makes your tutu around 12 inches in length.  Her advice about using a piece of card board to put the tulle around to make your cuts of tulle is GENIUS!  I suggest taking that bit of advice.  
So go out tonight - have fun - be careful and don't go onto sugar overload.     


October 26, 2011

More sewing this week

So I haven't done much cooking this week to post but I have been working away on my sewing machine.  Check out my newest projects:

 Birdies!!!  I found this pattern on spoolsewing.com . These were a little difficult at first but the 2nd bird (blue) turned out much better than the 1st bird (red).


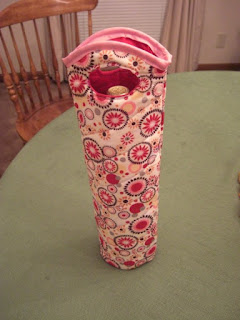
The wine bottle bag (and yes the bottle of wine says Mad Housewife!) was a real challenge for me.  I will be keeping this one myself because it is far from perfect.  I do however have some idea of what I am doing and what I should do next time to make it better.  I will probably try again at some point but this one took me several sessions of getting frustrated before I got it fixed.  I found the pattern on needleandspatula.com


And last of all are OWLS!!!  I LOVE LOVE LOVED making these owls.  They were so much fun and are so so cute. 

I found the pattern for these at Toad's Treasures.


All these patterns were free and since I don't really know what I am doing free is a good way to practice.  I thank all these ladies for sharing their patterns and their talents.  Check out their blogs for all sorts of cute stuff.

Hope that you are all having a great week!

October 23, 2011

Camera strap cover

Wow!  2 posts in one day?!?!?!  What can I say?  I LOVE my new sewing machine.  
I made this camera strap cover this afternoon.  

I followed the AWESOME tutorial by Priddy Creations. And it turned out great.  My camera strap is a little longer than what she gives the instructions for so I lengthened by pattern by a couple of inches.  That had me worried since I am new to sewing but it turned out great. 

Key wristlet ~ My first sewing project

For the last couple years I have told Russel how much I wanted a sewing machine.  He kept telling me to get one but I just never did.....until this past week.  I bought a Brother NS40 and I love it.  I had my first sewing lesson on Thursday.  I am pretty much still just sewing in a straight line but I figured out a project I can do & I want to share that with you.  If I can do it and have had a sewing machine for only 5 days I think anyone with a sewing machine can do it.  I got my idea for the key wristlet from the Thirty-One brand wristlet that I bought a couple weeks ago.  Below are the instructions.

Items you need:
sewing machine
two matching rolls of ribbon
coordinating thread
lighter
Depending on what size you want your wristlet to be you can get either rolls of 5/8 & 7/8 or 3/8 & 5/8 inch wide ribbon.  For this blog I used 3/8 inch white polka dot ribbon as the top and 5/8 inch red polka dot ribbon for the base.  For a wider wristlet use 5/8 inch as your top and 7/8 inch as your base ribbon.

Cut a 15 inch piece length of each of your ribbons (picture below)


 Then I took a lighter and melted one end of each ribbon to keep it from fraying. (picture below)
Line up your two ribbons with the smaller ribbon in the center and sew across the width of one end.  (picture below)
 Then sew down the length of the smaller ribbon to attach it to the larger ribbon.  Do this for both sides. (picture below)
Once the length of the ribbon is sewn on each side then melt the ends of the ribbon that isn't yet sewn together.  Sew across the width of the ribbon so that all four sides of the smaller are now sewn to the base ribbon.  
Then fold the ribbon over to leave about 2 inches of the end as a "tail". (picture below)
Fold the "tail" piece over and let it over lap the facing ribbon by about a 1/2 inch. (picture below)

Sew across the width of the ribbon at each end of the overlap. (picture below)  I didn't pin this I just held it as I sewed.

Attach to a key ring and you have your own key wristlet in your personalized colors.  


FYI:  A 3 yard roll of ribbon will yield about 7 wristlets if cut in the 15 inch pieces.  

I am glad that you visited my blog and are checking out the key wristlets.  While my tutorial is meant for you to use please give credit where credit is due and link to my blog for the original instructions. 

Happy Sewing!


October 19, 2011

Tonight the Great Pumpkin...

will rise out of the pumpkin patch.  He flies through the air and brings toys to all the children of the world - Linus (It's the Great Pumpkin, Charlie Brown)

I love fall.  The cool breezes, falling leaves, hot chocolate, bonfires, pumpkins, and Halloween costumes.  
I do miss the warmth of the summer but all the things that come with fall just make me smile.  Today it has gotten pretty chilly.  I came close to flipping on the heat but decided to throw on flannel pj's and a couple extra blankets to the bed instead.  
Here's some of our fall activities. 

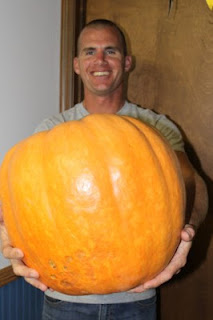
Our "award winning" pumpkin that we put in the Robertson County Fair.  

While the girls were here for fall break - the three of us went to Bradley Kountry Acres and picked out some pumpkins to paint.  I did get some pictures at the pumpkin patch but forgot to get pictures of the finished product.   


 <----- Parking this way!


My sweet pumpkins are so good to pose and smile no matter what I have them doing.  They are so beautiful it's hard not to take tons of photos.  

And coming soon......pictures of my much anticipated halloween costume as well as the recipe  for white chocolate butterscotch blondies (that is if my first batch turns out good).

~~~~Happy Fall Ya'll~~~~

October 17, 2011

Fun in the Dirt

The last two Sundays, Russel and I have spent our afternoons at Dunn's Playground.  Use to I would go and sit and take pictures while Russel rode his dirt bikes.  Fun???  Yes!  But now oh so much more fun now that I have my own set of wheels!!!!! There are no pictures of me in my RZR but I was there and having a blast.  Thanks in part to Travis opening up his place for two wheels and four but mostly thanks to Russel for finding me something that I would love to drive. 
Here are some of the pictures that I took. 
Russel on the step up.
Russel.

 Danny Dunn whipping it on the step up.
Jesse D riding in style.
And just so you know what I am talking about - this is me driving Nanny around in my RZR the night we got it.  THAT took some convincing.


October 13, 2011

1st post: 1st time Recipe

I am starting with my first post as my first time making a new recipe - Baked Crab Rangoon!
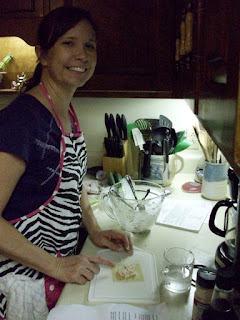
Russel is home so he is my photographer therefore I am actually in the pictures.  That never happens. 
Above is the finished product.  They turned out so yummy that I couldn't wait to put in the finsihed picture.
Ingredients:
1/8 Teaspoon Garlic Salt
1/8 Teaspoon Worcestershire Sauce
14 Won Ton Wrappers
1 Small Green Onion
4 Oz Imitation Crab Meat
3 Oz Softened Cream Cheese

Directions:
Preheat oven to 425 degrees.
In a small bowl, combine softened cream cheese, garlic salt, and worcestershire sauce until smooth.
Chop onion and flake apart crab meat.
Stir in crab meat and onion. 
Place a spoon full of mixture onto each wonton wrapper. 


Moisten inside edges of wrappers and pinch up sides to seal. 

Place on baking sheet coated with non stick cooking spray. 

Spray wontons lightly with the cooking spray. 
Bake at 425 degrees for 8 to ten minutes.  The wontons will be golden brown and slightly crunchy. 

 YUMMY!

I found this recipe on Pinterest which is my new love for the internet.  I am finding all sorts of great recipes, crafts, fashion and home ideas.